|
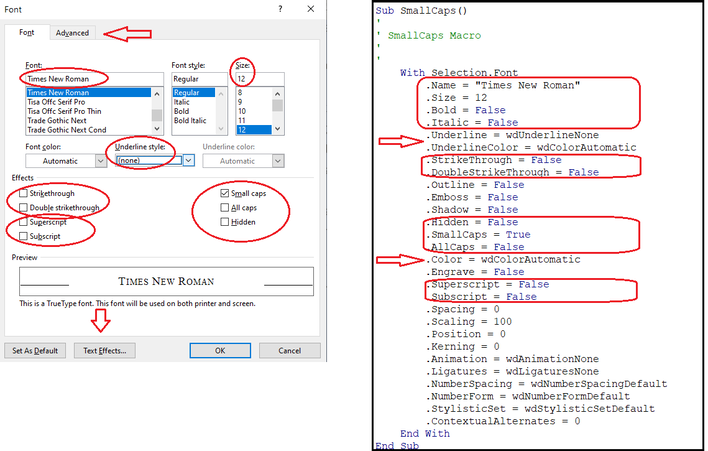
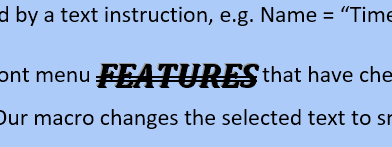
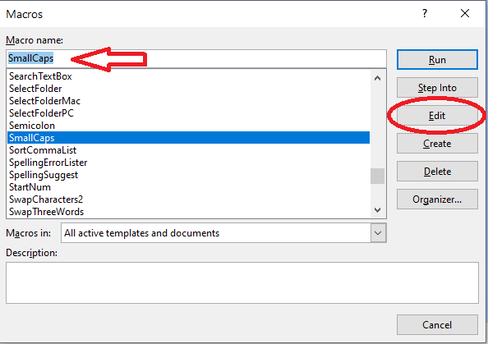
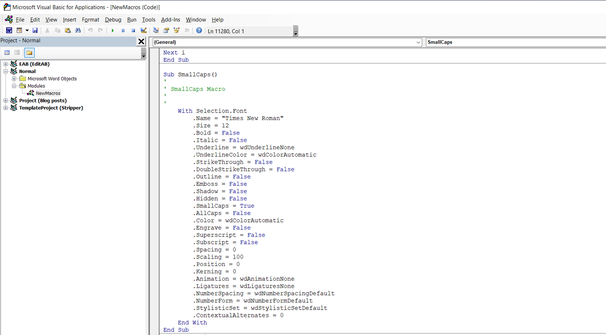
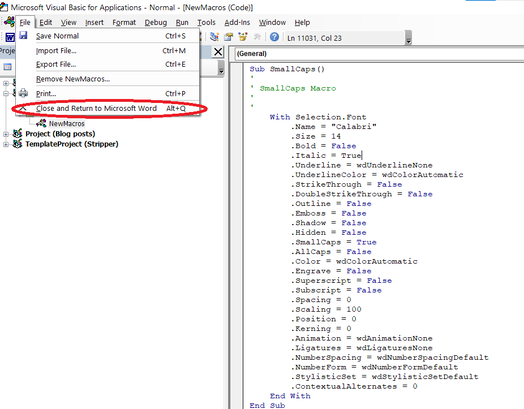
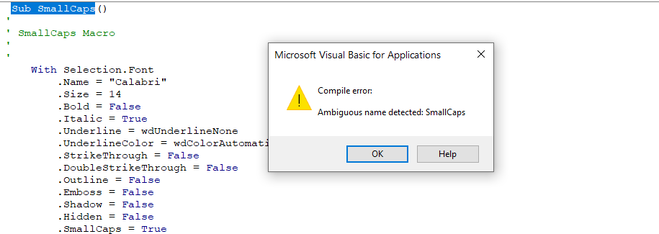
In Macro baby steps part ii – Recording your own macros, I mentioned that macros can be edited. In fact, being able to edit macros is one of the great things about them, so it’s quite useful to understand enough about how macros work to have the confidence to tweak your own macros – and other people’s. If you remember, in Macro baby steps part ii we recorded the SmallCaps macro using the Font menu to choose Small caps for a word that we had selected before starting to record the macro. If you look closely at the macro, it begins with the macro name and gives some information about the macro in green type. Then, the macro lists the instructions that Word needs for a particular font. This picture compares SmallCaps macro (on the right) with the Font menu (on the left): you should be able to see that all the circled features in the Font menu are in the macro, but in a less user-friendly format. Some font features are specified with a command, e.g. underlining, underlining colour, colour etc, but others are specified by a text instruction, e.g. Name = "Times New Roman", Size = 12. The macro uses ‘= False’ or ‘= True’ for the font menu features that have check boxes: strikethrough, sub- and superscript, small caps and all caps. Our macro changes the selected text to small caps so it won’t surprise you to see ‘SmallCaps = True’. Now for the fun bit! There are parts of this macro that you can alter. Don’t try and fiddle with anything you don’t understand, but see what happens if you change the font name and size and type ‘True’ instead of ‘False’ for some of the other options (although it’s best to keep ‘Hidden’ as ‘False’ otherwise the macro will make all the changes, you just won’t be able to see them!). You have probably just made this macro completely unusable for all normal editing tasks! But, it might be that you have a client who wants some words in All caps rather than Small caps, or who wants some text in italic superscript … and now you can edit a macro that you have already recorded to do just that! How to edit a macro – step-by-step instructionsGo to the ‘View Macros’ menu on the view tab. Select the macro you want to edit and click on ‘Edit’: This will bring up the VBA editor. Carefully, make the changes you want – you will need to use initial caps for ‘True’ and ‘False’. Then use the File menu to save your changes (or the icon) and close the VBA editor. You have now edited your macro! If you want to keep both versions of the macro – so you want a SmallCaps macro for one client and an ItalicSuperscript macro for another client – select and copy the entire SmallCaps macro from the beginning – from Sub SmallCaps() – up to and including End Sub. Scroll down to the bottom of the VBA editor using the scroll bar on the right-hand side, and paste the text at the end, underneath the ‘End Sub’ from the last macro. You need to edit the macro name before you try and use the macro because if the VBA detects two macros with the same name, you will get this message: If this happens, don’t panic – just edit the name of your macro so that it’s unique. Editing other macrosYou can apply the same principles to other macros. Here is the 'PatientsWith' macro: Remember that we selected a word (which happened to be a name of a disease), and then recorded a macro as we cut, moved one word to the right, typed 'with' and pasted the original word. Each of these steps is written in one line in our macro. The line which gives the instruction to type 'with' is in the middle: You can edit the text between the double quotation marks if you want a macro to write something else. I have edited my PatientsWith macro so that it changes: The macro now looks like this (fingers crossed that I change it before I use it again!): Now you understand how to edit a macro, you can correct some of the mistakes that you might have made when you recorded a new macro without having to go through the recording process again. For example, you might have a typo which you can correct, and I often alter the spacing in macros that add text – I prefer to add in extra spaces to make sure that words don't run into each other as it is much easier to remove double spaces than to separate words that have been joined accidentally. Editing macros that have been written by someone elseThere are some macros which need system-specific information to run properly or need you to make some decisions about exactly what you want the macro to do before you run it. This is true for quite a few of Paul Beverley's macros, including some of my favourites – GoogleFetch, CopyToList and MultiSwitch. The NumberIncrement macro adds or subtracts a specific number from the number you have selected. The default option is '1', but you can edit the macro to add or subtract any number you want. I find this quite handy when I am renumbering references. Paul always gives instructions about which parts of his macros either need to be edited, or can be edited, and hopefully now you will find this process less alarming than you once did. Go back to: Macro baby steps part ii
Archives October 2021 Categories All
0 Comments
Your comment will be posted after it is approved.
Leave a Reply. |
Details
AuthorAndrea at Yours Truleigh Editing Archives
November 2023
Categories
All
|


 RSS Feed