|
The Quick Access Toolbar is a handy place to keep your most frequently used Word features. It's a feature of all Microsoft Office products, but it's not something that I have made use of in anything other than Word. If you haven’t added anything to your Quick Access Toolbar, you will probably find it on top of your ribbon looking something like this:
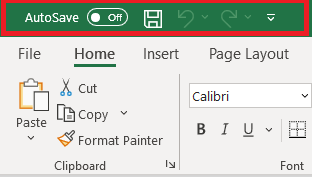
The default position of your Quick Access Toolbar is in the Title bar above the ribbon, but it is probably of more use to you in its alternative position below the ribbon. To move it, you need to go to the File menu (at the top left-hand side of your screen), go to Options (right at the bottom in Word 365), then click ‘Quick Access Toolbar’ (which is located just underneath ‘Customise Ribbon’): 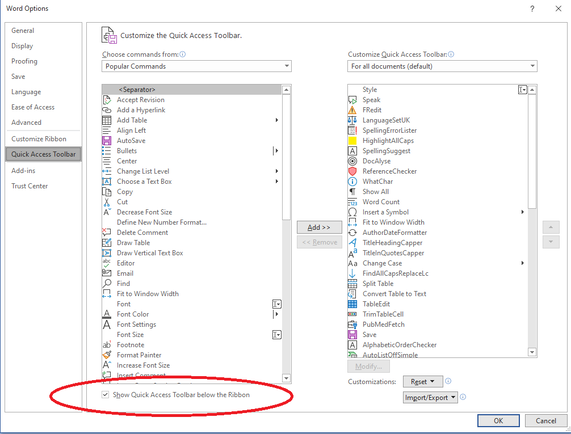 If you tick the box right at the bottom that says ‘Show Quick Access Toolbar below the Ribbon’ your Quick Access Toolbar will move and, should now look like this: 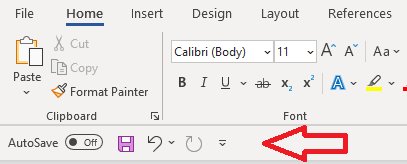 Exciting though this is, this Quick Access Toolbar only has a couple of functions (Autosave toggle, Save, Undo and Redo), which is all very well, but, since we all save using CTRL+S and undo things using CTRL+Z, what is the point of it? The really handy thing about the Quick Access Toolbar is that you can populate it with whatever Word command that you want. Mine now looks like this:  My Quick Access Toolbar is so full because I store a lot of macros here, but you don’t have to start exploring the world of macros to start using your Quick Access Toolbar … (if you are feeling inspired, this post might help) ... because you can put all your favourite Word commands on the toolbar as well. Below, I’ve circled the icons on my toolbar that are ordinary Word commands that I can also access in Word via the usual tabs and menus. These are all commands that I use a lot (or that I use occasionally and are quite well hidden) so I have put them somewhere accessible: 
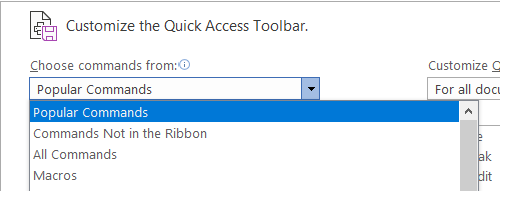
How to add a Word COmmand to the Quick Access ToolbarTo add a Word Command to the Quick Access Toolbar, go back to the Quick Access Toolbar section of the Options menu. This should bring you to this menu: 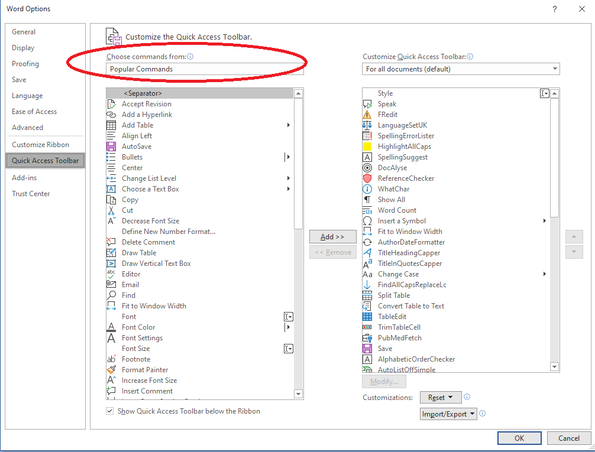
The first three options offer you Word Commands. The first two options give you a slightly different selection of the commands and the third option gives you the rather mind-boggling list of all the Word Commands there are – scroll through and have a look! If you can’t find the command you are looking for, try a little Googling to see if you can find what it's called, and look it up on ‘All Commands’, which lists all the commands in alphabetical order. Choose the command you want (I’ve chosen ‘Add Table’ for this example), then click on ‘Add >>’ to add it to the toolbar. You can alter its position on the toolbar using the up and down arrows on the right-hand side. I decided that I might use this command quite a lot so I have moved it up the list so that it sits on the left-hand side, quite near the beginning of my list of commands and macros. 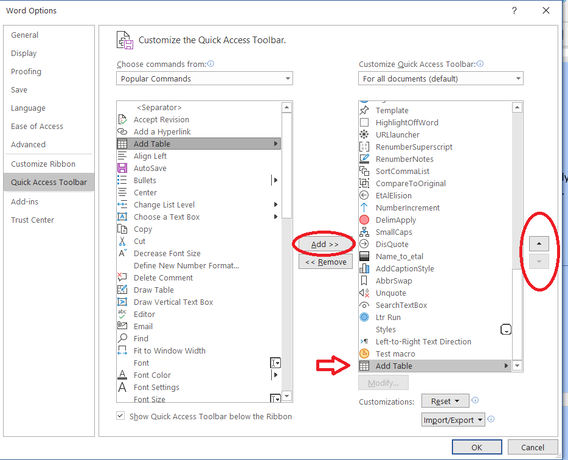 The command will now be in easy reach of your mouse! 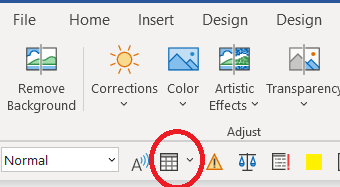 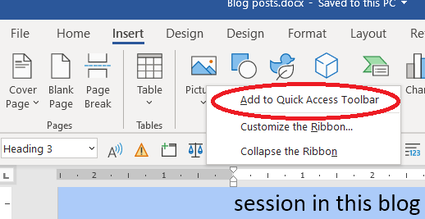 For a really quick way to add Word commands to your Quick Access Toolbar, try right-clicking on the command you want to add. For example, to add the 'Insert Pictures' command, right-click on the 'Pictures' icon on the Insert tab and then click 'Add to Quick Access Toolbar'. If you want to rearrange the icons on your Quick Access Toolbar, you will need to open the 'Customize the Quick Access Toolbar' menu from the Word options menu, as I described earlier. Go back to: Macro baby steps part iii
Archives October 2021 Categories All
0 Comments
Your comment will be posted after it is approved.
Leave a Reply. |
AuthorAndrea at Yours Truleigh Editing Archives
November 2023
Categories
All
|
 RSS Feed