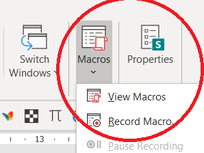
YOURS TRULEIGH EDITING
  • Home
  • Services
  • Portfolio
  • Testimonials
  • Contact
  • Blog

11/1/2021

What is a Word Macro: Macro baby steps part ii

2 Comments

Read Now
 

Recording your own macros

​In What is a Word Macro: Macro baby steps part i, I promised that I would show you how to record your own macro. In Word, macros are accessed via the Developer tab (read Where is the developer tab? if you can't find it) or the View tab, which you can find here:
Picture
​If you click on the little 'down' arrow, you get options to 'View Macros' or 'Record Macro':
Picture
​Click on 'Record Macro' to get a pop-up box which looks like this:
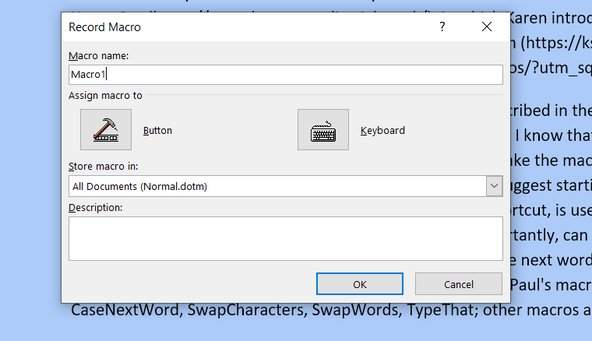
Picture
M​This box allows you to name your macro, assign it to a button on the Quick-Access Toolbar and/or give it a keyboard shortcut.* Feel free to play with all these options, but you can access them all once you have got your macro working so you can ignore them for now. When you click on ‘OK’ you will be recording your macro. This means that Word will record every keystroke and click you make in the macro so you need to plan what you are going to do!

Once you have a plan, click ‘OK’ and start recording your macro. Your mouse pointer will change to an arrow with a cassette tape to remind you that you are recording. When you have finished, press ‘Stop recording’ (located in the same place as ‘Record Macro’). If you need the macro to select any text, you need to make the selection using the keyboard as Word doesn’t register text selected using the mouse.
​
Here are the instructions for the two little macros I mentioned in Macro baby steps part i, just to give you some examples. 

​Convert text to small caps

  1. Click ‘Record Macro’.
  2. Bring up the Font menu (using CTRL+D or by clicking on the arrow at the bottom left of ‘Font’ on the Home tab).
  3. Select ‘Small caps’ and click ‘OK’.
  4. Click ‘Stop recording’.

​Change ‘asthma patients’ to ‘patients with asthma’:
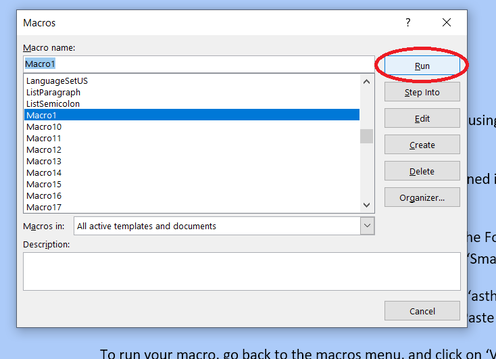
  1. Select ‘asthma’.
  2. Click ‘Record Macro’.
  3. Use CTRL-X to ‘cut’ ‘asthma’.
  4. Skip over ‘patients’ using CTRL+→.
  5. Type ‘with ’.
  6. Paste ‘asthma’.
  7. Click ‘Stop recording’.

how to run your new macro

​To run your macro, go back to the macros menu, and click on ‘View Macros’. Select your macro (if this is the first macro you have recorded or installed, it will be called ‘Macro1’**). Click on Run. 
Picture
Hopefully, your macro will run just as you planned, but if it doesn’t, it is possible to edit it, which you can do by clicking on 'Edit'.
​
(For the two example macros above, you will need to have selected a word before you run the macro otherwise either nothing happens or you will get an error message.)
Picture
​But ... clicking on ‘Edit macro’ opens up the macro in the Visual Basic editor, which looks pretty scary when you first see it  … so I talk about that in my How to edit a macro post.       
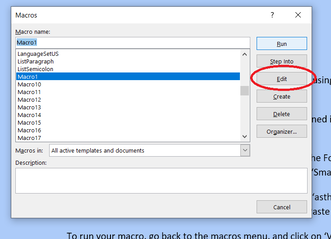
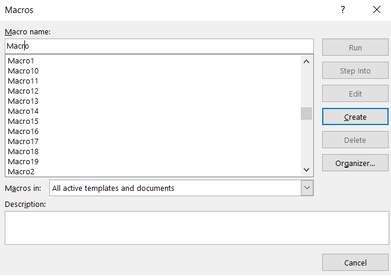
Now you have a macro to help you with your editing, it would be useful to be able to use it quickly and without thinking about it too much. What is a Word Macro: Macro baby steps part iii shows you how to do this.

*This box also asks you where you want to store your macro: if you choose the default option of ‘All Documents (Normal.dotm)’ you will be able to use your macro every time you use Word. You can add a description of your macro in the space at the bottom to remind you of what it does (but, again, you can sort this out later).
**Once you are more confident and are recording macros you plan to keep and use in your editing, you do need to name each macro (no spaces allowed!) and give it a description so that you remember what it does. You don't need a macro list that looks like this:
Picture

Author

Andrea at Yours Truleigh Editing.
www.yourstruleighediting.com

Picture

Archives

November 2023
December 2021
October 2021
August 2021
July 2021
June 2021
March 2021
February 2021
January 2021
December 2020

Categories

All
Advanced
Beginner
CIEP
Editorial Training
Intermediate
Macro Baby Steps
Macros
Music
PDF
PerfectIt
StetSwim
Time Off
Word Basics
Word Styles
Working With Word

Share

2 Comments
Melanie James link
22/2/2021 11:47:39

Very useful baby step-by-step instructions here, thank you.

Reply
Andrea
22/2/2021 13:23:56

Thank you, Melanie!

Reply

Your comment will be posted after it is approved.


Leave a Reply.

Details

    Author

    Andrea at Yours Truleigh Editing
    I'm an editor based on the south coast of the United Kingdom. I try and use the tools at my disposal to make the process of editing as effiicient and accurate as possible and I'm hoping to share some tips and techniques that I've picked up along the way. I'm an enthusiastic and grateful member of the Chartered Institute of Editing and Proofreading. Editorial freelancers benefit hugely from being part of supportive organisations:  for direct support for our work, such as training and providing routes for our clients to find us, but also for community, which is needed now more than ever. 
    Please note: all Word tips are based on Word 365 for PC. 

    Archives

    September 2024
    November 2023
    December 2021
    October 2021
    August 2021
    July 2021
    June 2021
    March 2021
    February 2021
    January 2021
    December 2020

    Categories

    All
    Advanced
    Beginner
    CIEP
    CIEP Conference
    Editorial Training
    Intermediate
    Macro Baby Steps
    Macros
    Music
    PDF
    PerfectIt
    Recipe
    Step-by-step Guide
    StetSwim
    Time Off
    Word Basics
    Word Styles
    Working With Word

    RSS Feed

Dr Andrea Kay
​Medical Editor | ​Yours Truleigh Editing

© COPYRIGHT 2025. ALL RIGHTS RESERVED.
  • Home
  • Services
  • Portfolio
  • Testimonials
  • Contact
  • Blog