|
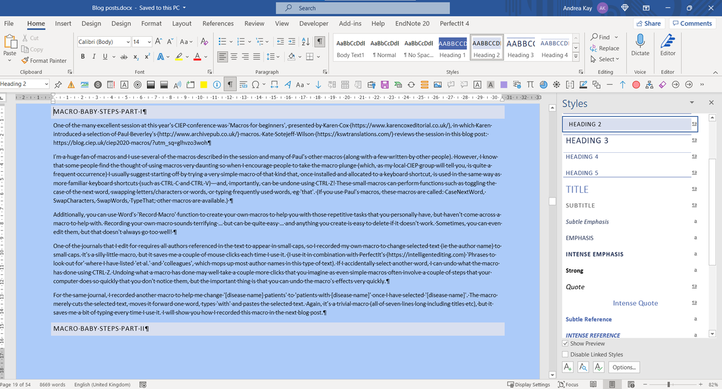
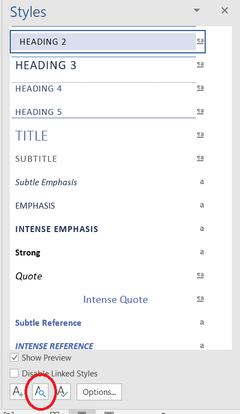
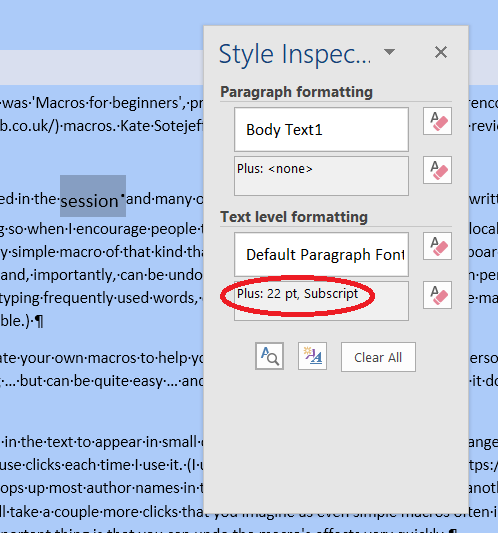
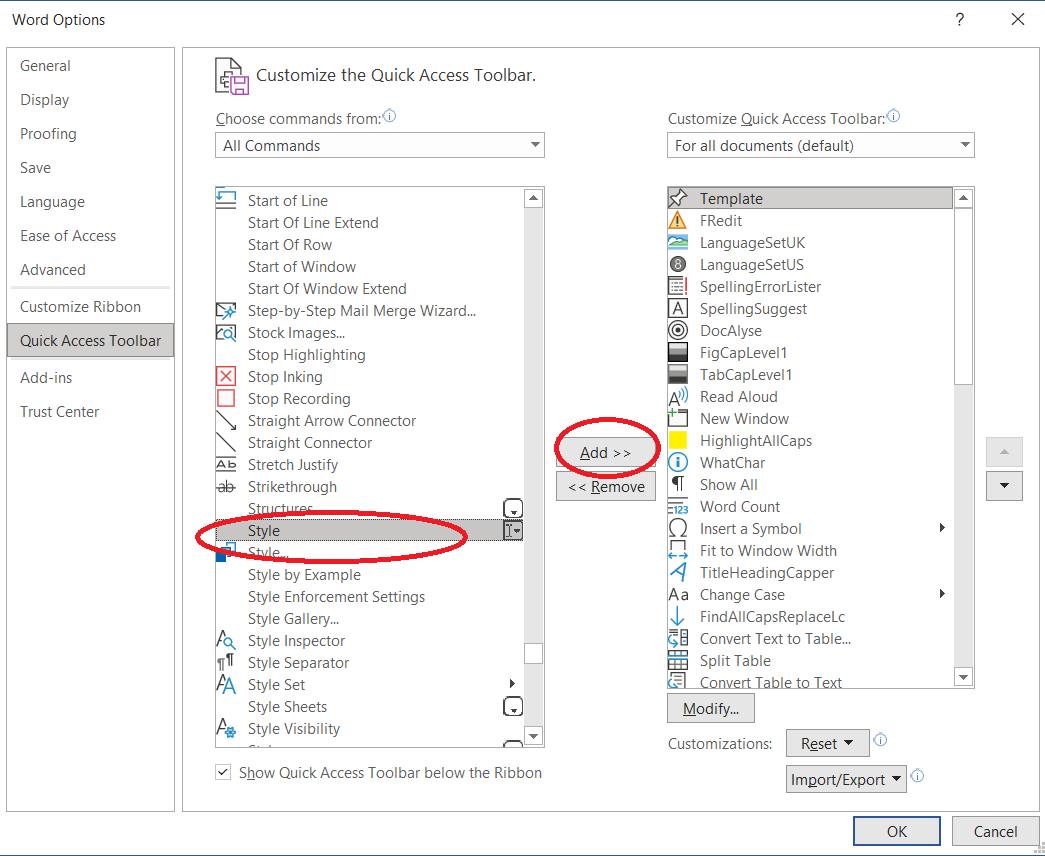
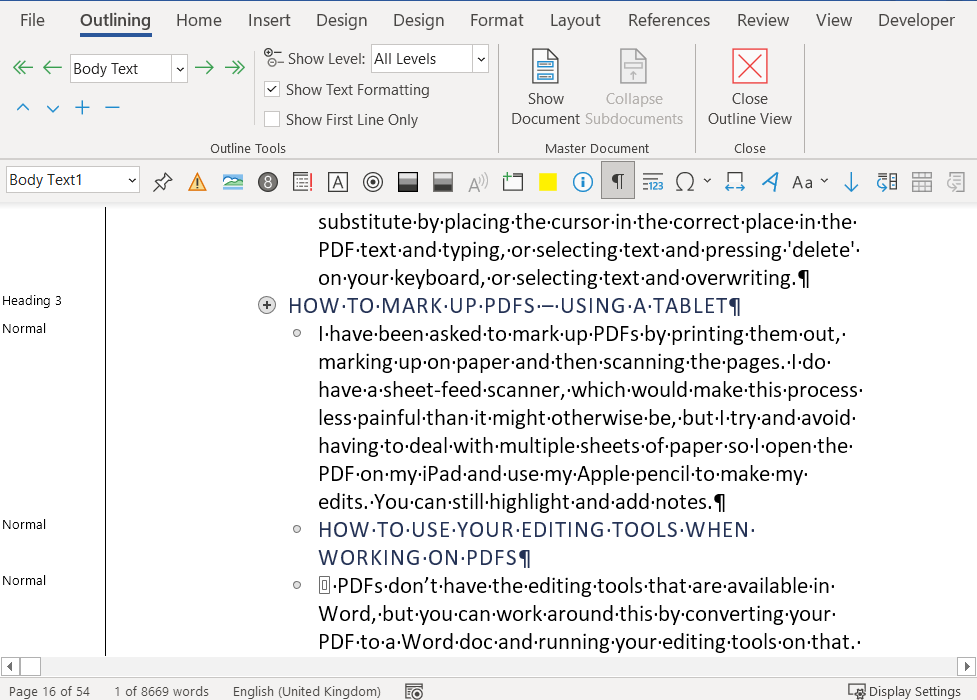
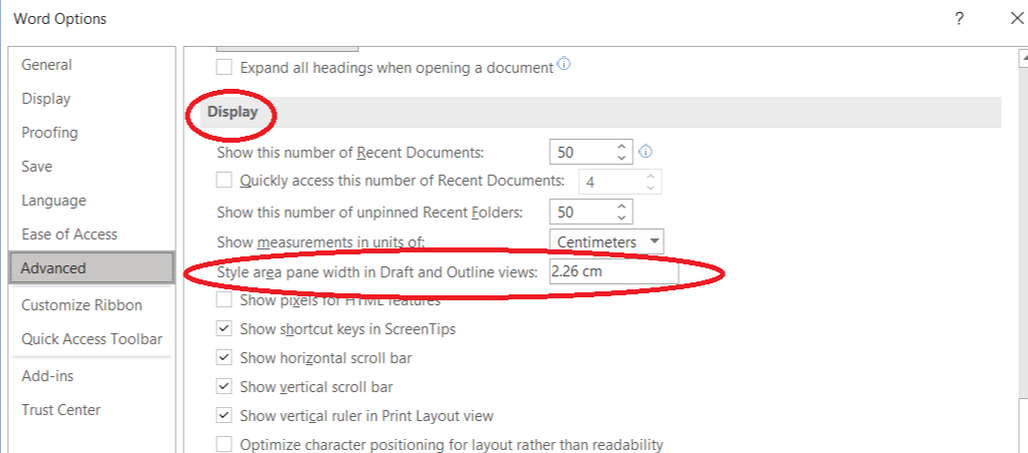
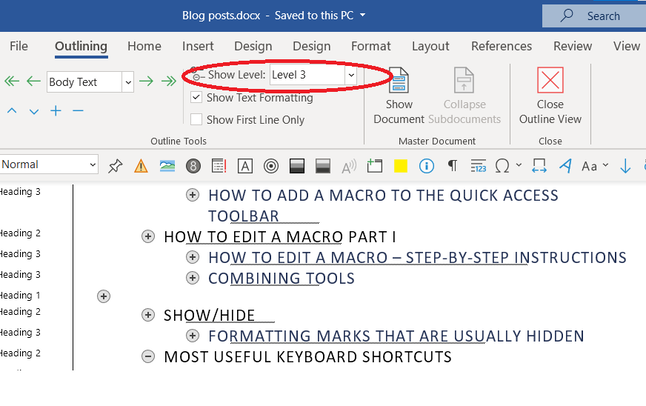
How do I know which Word Style I'm using, or which Style has been used, for a particular piece of text? Here are four different ways of finding out which Word Style(s) are being used, with tips for tracking down the source of other text oddities. Using the styles GalleryYou can find Styles on the Home tab on your ribbon. You might find that you are using a style displayed in the selection on the ribbon – the text I selected here was styled "Normal". Otherwise, you need to click on the arrow in the bottom right-hand corner of the Styles pane to see the Styles pane. The Styles pane will either be docked on the right-hand side of your Window or will float on top of your document. Personally, I prefer mine docked ... In this picture, my cursor is just to the left of the title 'Macro Baby Steps Part I' and the style used is Heading 2, which is identified by a box in the Styles pane. Be careful when you investigate the Styles pane – if you click on a style, Word will change the text where your cursor is to the new style! Using the Style inspectorIf you look closely at the bottom of the Styles pane, you will see some buttons. There is an "Options" button and three buttons marked with A's and another symbol. Click on the middle one (with the A and the magnifying glass) to get the Style Inspector. The Style Inspector gives you all the information you need about the styles applied to the bit of text you selected. This is what the Style Inspector says about the heading I had selected in the document shown above. 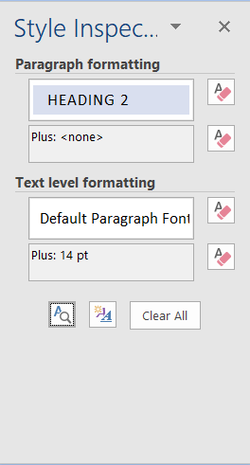 Notice that the first two boxes are labelled "Paragraph formatting" and the second two are labelled "Text level formatting". This is because some styles deal with how entire paragraphs look and behave (these styles are given the symbol ¶ in the Styles pane) and some styles deal with how individual characters look inside paragraphs (these styles are marked with an 'a' in the Styles pane). The text that I had selected uses the "Heading 2" paragraph style and the "Default Paragraph Font" style at text level. Using the Styles Inspector to spot text odditiesThe Styles Inspector* is useful for when you can see there is something strange about your text, but you can't quite put your finger on what. In the picture below, "session" is out of line with the rest of the sentence. The Style Inspector shows that this is because it's actually subscript, although the font is bigger than the rest of the text so this is slightly disguised. This is a bit of a contrived example, but this type of weirdness does crop up from time to time! Adding the Styles drop-down box to the Quick-Access ToolbarIf you just want to keep an eye on the style applied to the bit of text that you are working on, you can use a Style box on the Quick Access Toolbar. You can find instructions for adding items to your Quick Access Toolbar in another post. To add Styles, in "Customize the Quick Access Toolbar", go to "All Commands" and scroll down until you find "Style", then click on "Add". This gives you a drop-down box that tells you what style is being used where your cursor is, and allows you to change Styles too (although it's usually easier to change styles using the Styles Gallery). This is what the Heading 2 style we were looking at earlier looks like in the Styles box on the Quick Access Toolbar ... Using Word's outline view to keep an eye on the styles used in your documentWord has a handful of different "Views" for documents. You can see them if you go to the View tab on the Ribbon. Select Outline view by clicking on "Outline" ... Your document will end up looking quite different. All the fancy text disappears, along with the pictures, and you are left with something that looks like this ... You can see that the Styles used are listed in a column down the left-hand side. You might not be able to see this list the first time you open Outline View. In this case, you need to adjust the "Style area pane width in Draft and Outline views" setting in Word Options to approx 2.25 cm. You access Word Options via the File menu on the top left-hand side of your document) and this setting is in the Advanced section ... On the subject of Word's Outline view ...Outline view is useful to check your documents headings and heading levels. On the Ribbon (in Outline view), there is a drop-down box marked "Show Level". Use this to select the number of heading levels that you want to see – in the example below, I have selected Level 3. This will show me Heading 1, Heading 2 and Heading 3 – but not any of the text in between (don't worry, it hasn't vanished!), so that I can check the heading text, and make sure that the levels make sense. I think I might have some work to do with this document! * You can also add the Styles Inspector to your Quick Access Toolbar. See First steps with Word Styles for some of the benefits of using Word Styles and Four ways to apply a style to find out how to add styles yourself.
Archives December 2021 Categories All
0 Comments
Your comment will be posted after it is approved.
Leave a Reply. |
Details
AuthorAndrea at Yours Truleigh Editing Archives
November 2023
Categories
All
|





 RSS Feed